Rushmore is an 18-hole golf course set within one of the most stunning landscape settings of Southern England, high on the chalk of the Cranborne Chase in Wiltshire
A Course With 9 holes in Wiltshire & 9 in Dorset
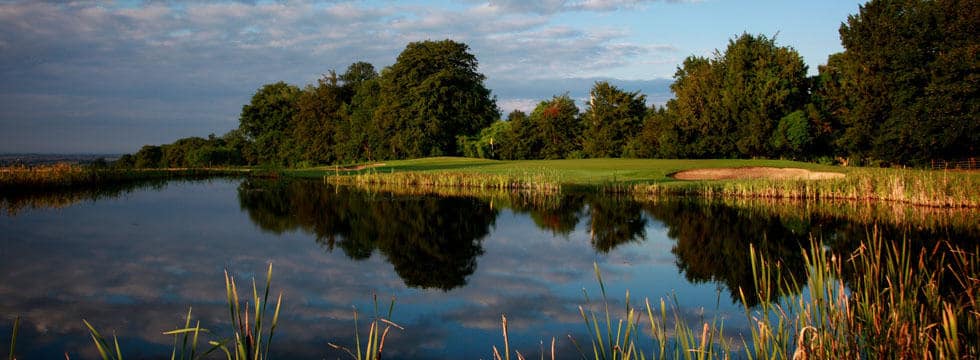
Set in the heart of the historic Rushmore Park, the course is a haven of peace, with only the abundant wildlife & spectacular views to distract from your game.
Rushmore Golf Course Overview
Rushmore Golf Course combines the best of both worlds; a thoroughly modern golf course set in beautiful, ancient parkland which is now forging a reputation as one of the best golf courses in the region.
The course compromises of 18 challenging holes set out over 6349 yards from the championship tee. A thought provoking layout will offer both a test to the golfer’s playing ability and course management.
A combination of 3 par 5’s and 4 par 3’s ranging from 548 to 162 yards will ensure all aspects of the golfer’s game will be tested.
The 9 holes situated in Dorset will be the only place a bunker can be found to the relief of many however the Sequoia trees which tower over the course are ever present for the whole journey.
Rushmore Course Rating and Slope Rating
| Tees | Par | Yardage | Rating | Slope |
|---|---|---|---|---|
| White (Men) | 71 | 6349 | 70.6 | 130 |
| Yellow (Men) | 71 | 5894 | 68.3 | 125 |
| Yellow (Ladies) | 72 | 5894 | 74.5 | 131 |
| Red (Ladies) | 72 | 5483 | 71.8 | 126 |
Rushmore Course Planner: Individual Hole Analysis
Hole 1 Par 4
ARUNDEL
WHITE 384 YARDS | YELLOW 346 YARDS | RED 313 YARDS
The opening tee shot should be aimed just left of centre to allow for the natural contours taking the ball to the right side of the fairway – this will give the best line into the green.
The green has a steep drop off to the right so the percentage play is to aim at the left side where there is a bank that will provide some help to any slightly errant shot in.
Hole 2 Par 4
GENERAL’S AVENUE
WHITE 414 YARDS | YELLOW 388 YARDS | RED 370 YARDS
Aim your tee shot just right of centre, as the best line to this undulating green is from the right side.
The second shot has to be played with care.
You need to be bold to get on the green as there is a slope at its threshold, but you do not want to go through here as there is a steep fall off over the back.
The green also has many testing slopes & so if you make a par or better here, you can congratulate yourself.
Hole 3 Par 4
LIONEL’S AVENUE
WHITE 344 YARDS | YELLOW 323 YARDS | RED 323 YARDS
With a tree standing sentry in the middle of the fairway, this tee shot should be given your full concentration –
the ideal shot is just left of centre with a gentle fade, as being on the right half of the fairway will give the best line in, without having to carry the pond guarding the left side of the green.
The green has a back tier & you may need more club if you intend to attack the pin if it is in this position – the safest shot though, is to go for the middle of the green & rely on your putter.
Hole 4 Par 3
GREAT CARTWAY
WHITE 162 YARDS | YELLOW 130 YARDS | RED 125 YARDS
Club selection is important here, as over the green is a deep swale & short is the water hazard – so play for the centre of the green wherever the pin is located & rely on your putter for par or better.
Hole 5 Par 4
SHIRE RACK
WHITE 449 YARDS | YELLOW 383 YARDS | RED 332 YARDS
Ideally this tee shot should be played down the left side of the fairway to give the best line into the green, but it does mean that the two bunkers on the left can come into play & need to be avoided.
The drive safely negotiated, then the second is best played to be carried all the way onto the green, taking the deep bunker guarding the front right out of play
if you cannot pitch the ball all the way, a gentle fade at the left edge of the green is a good ploy to avoid the trouble.
Hole 6 Par 3
LITTLE CARTWAY
WHITE 184 YARDS | YELLOW 178 YARDS | RED 157 YARDS
A tough short hole that demands respect – the ideal shot is to pitch your ball all the way into a green that slopes from back to front.
The safe shot for the more defensive, is to take plenty of club & play a fade at the left edge of the green.
Hole 7 Par 5
ENTRENCHMENT BARROW
WHITE 548 YARDS | YELLOW 519 YARDS | RED 429 YARDS
A par 5 best played with the head, rather than the heart.
Unless you are a very long hitter, play your tee shot left of the marker post, where there is plenty of room & away from the trouble on the right.
The second should be played to favour the right half of the fairway & position well short of the plantation on the left & the pond on the right.
From here you have a straightforward pitch to a long green & a chance of a birdie.
Hole 8 Par 4
MICHAEL’S POND
WHITE 434 YARDS | YELLOW 429 YARDS | RED 417 YARDS PAR 5
A tough hole that needs a good tee shot at the marker post.
The second shot is most demanding & players should weigh up the risks & rewards of playing for the green if it is near the limit of their shot-making agility, as it may be prudent or lay-up & play a pitch, rather than risk the water.
The shot to the green ideally needs to finish on the same level as the pin, so pay particular attention as the where the pin is place & club accordingly – if in doubt too much is better than too little here!
Hole 9 Par 4
MONKS ARUNDEL
WHITE 395 YARDS | YELLOW 367 YARDS | RED 351 YARDS
A hole to test your course management starting with a tee shot that must be played left of centre & the driver is not recommended.
Ideally a fairway wood or long iron down the left will leave a short iron to the green – this too is best played to feed in from left of the pin as going right is definitely something to be avoided, as the natural contours will take your ball further right towards the Out Of Bounds.
Hole 10 Par 4
DOUGLAS PLECK
WHITE 358 YARDS | YELLOW 336 YARDS | RED 314 YARDS
A testing drive that should finish right of centre to give you an unhindered line to the green – the fairway slopes from left to right here, so pay particular attention to your aim, else you could be shut out by the oaks guarding the left side of the fairway.
The second too is all uphill, so take enough club.
Hole 11 Par 4
FIVE WAYS
WHITE 337 YARDS | YELLOW 284 YARDS | RED 264 YARDS
This tee shot is all uphill & with bunkers left & right care must be taken as to where you go – long hitters if they can, play a gentle fade can take the right hand bunkers out of play by carrying them, whilst mortals may play for the left hand ones & with a fade finish nicely on the fairway, with a pitch up to the green.
Keep in mind that the green, being raised, your second will play longer & that here are tow well positioned bunkers front left to catch anything under hit.
So playing just right of the pin with enough club is the best option.
Hole 12 Par 5
PIER GATE
WHITE 523 YARDS | YELLOW 498 YARDS | RED 456 YARDS
A drive up the left side of the fairway & a second favouring the right side will leave a pitch into a very undulating green.
This is one hole where being too bold can be worse than being short, so play your approach carefully & you will be rewarded with a chance of a birdie.
Hole 13 Par 4
BADGERS GLORY
WHITE 324 YARDS | YELLOW 311 YARDS | RED 311 YARDS
Long hitters may not need a driver here as, in dry conditions, the pond may be reachable.
A tee shot of 220 yards at the marker post or left of it will leave a full pitch in to this green that is wide, but does not have much depth – distance control is critical.
The green slopes left to right, so where practical, aim to finish right of the pin for an easier uphill putt.
Hole 14 Par 3
RAVENS CORNER
WHITE 160 YARDS | YELLOW 151 YARDS | RED 140 YARDS
This short hole is all uphill to a small green providing a good test to all players.
Take more club than the distance suggests & if in doubt it is better to be long right than short & left.
Hole 15 Par 5
CHASE PARK
WHITE 501 YARDS | YELLOW 480 YARDS | RED 462 YARDS
A tough hole, especially when played into the prevailing wind.
The tee shot should favour the right side of the fairway, followed by a second shot that too should favour the right side to provide the best line into the green which is guarded on the left by a mound.
Hole 16 Par 4
ROTHERLY
WHITE 299 YARDS | YELLOW 274 YARDS | RED 244 YARDS
The tee shot is very important here & ideally between 220 – 240 yards, which will leave a clear shot to the green.
The green slopes from back to front & the ideal shot in will leave your ball short of the hole for an uphill putt.
Hole 17 Par 3
STRAIGHT KNAPP
WHITE 185 YARDS | YELLOW 165 YARDS | RED 159 YARDS
A difficult short hole as the ground in front of the green is flat to the player & the pin is usually such that you cannot see where it is cut – so rely on your yardages & play your tee shot just to the right of the flag as anything left may be thrown off the green by the slope & contours.
Hole 18 Par 4
WILLIAM PITT
WHITE 384 YARDS | YELLOW 332 YARDS | RED 316 YARDS
Accuracy is more important than length on this tee shot – a gentle fade up the middle is ideal to leave a good line into the green.
This hole has the longest green on the course & when the pin is place on the back tier you will need at least one more club to finish on the same level & make putting for that final birdie easier.