Whitley Course Planner will help you saves shots on your round and help you know when to be more conservative and when to attack.
A Friendly Family Run Business
The course opened in 1993 after converting some of the farmland on the family dairy farm with the objective of getting people into golf.
It is now a thriving pay as you play Golf Club which also has memberships available.
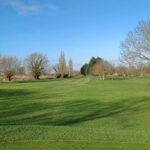
Whitley Course Overview
The nature of the course means that on several of the holes there are different ways of playing them and your course management will be tested to the maximum – the way we believe golf should be!
Having two sets of tees on each hole means that you can play 18 holes and have a degree of variety from the front nine to the back.
The 9 hole par 35 course is short enough for beginners to enjoy but also provides a stern test for established golfers with three par 3’s, four par 4’s and two par 5s.
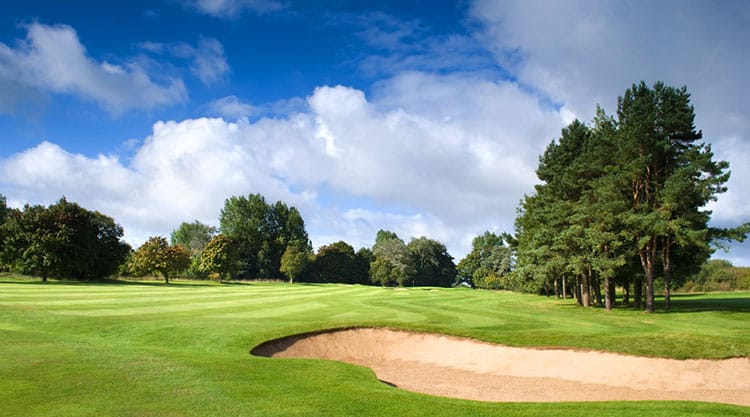
Internal out-of-bounds, ditches, bunkers and other well placed hazards mean this course gives a true test of golf, designed in the traditional sense – accuracy is rewarded rather than distance, as is common with modern day courses.
Whitley Course Scorecard
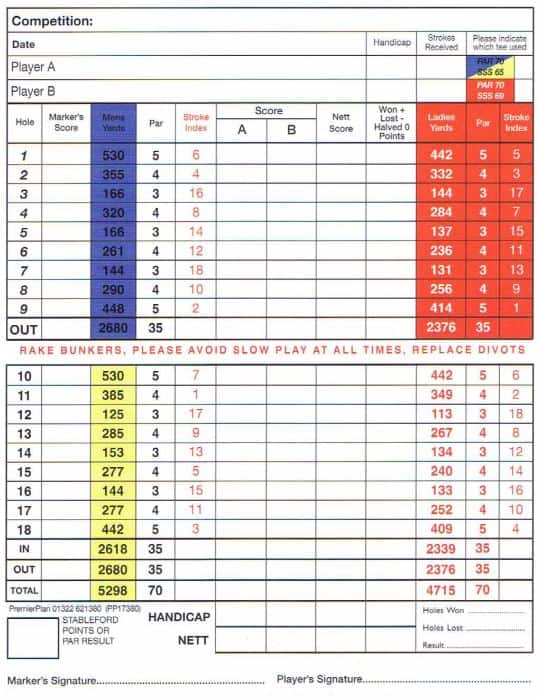
Whitley Course Rating and Slope Rating
| Tees | Par | Rating | Slope |
|---|---|---|---|
| White (Men) | 70 | 66.1 | 116 |
| Red (Ladies) | 70 | 68.7 | 118 |
| Back (Men) | 70 | 66.0 | 115 |
| Back (Ladies) | 70 | 70.7 | 122 |
| Forward (Men) | 70 | 63.1 | 101 |
| Forward (Ladies) | 70 | 67.3 | 112 |
| Winter | 70 | 65.3 | 114 |
Whitley Course Planner: Individual Hole Analysis
Hole 1 Par 5
STROKE INDEX 6
BLUE 530 YARDS | RED 442 YARDS
A long opening hole, needing a long straight drive which avoids the Out of bounds (OB) all up the left before the fairway turns slightly left to a green that is angled behind a large bunker.
Hole 2 Par 4
STROKE INDEX 4
BLUE 355 YARDS | RED 332 YARDS
Accuracy is paramount here, making sure you leave yourself a good angle into the green, our view of the green is slightly obscured by trees. Club selection has to be right and can be difficult if the wind is blowing.
Hole 3 Par 3
STROKE INDEX 16
BLUE 166 YARDS | RED 144 YARDS
Either a mid or short iron depending whether playing it the first or second time.
Can be really tough if the flag is placed behind a bunker at the front of the green
Hole 4 Par 4
STROKE INDEX 8
BLUE 320 YARDS | RED 284 YARDS
The sensible approach is a short iron to in front of the hedge, then another onto a large, flat green.
The brave might try a thrash with a wood, but OB all down the right –hand side could change your mind.
Hole 5 Par 3
STROKE INDEX 14
BLUE 166 YARDS | RED 137 YARDS
Straightforward approach with a mid to short iron, but anything right faces a watery grave in the brook or the moat alongside the green.
Hole 6 Par 4
STROKE INDEX 12
BLUE 261 YARDS | RED 236 YARDS
A severe dogleg left. Take enough club to reach the corner, or you will be playing a blind short iron or wedge to a tucked-away green.
Hole 7 Par 3
STROKE INDEX 18
BLUE 144 YARDS | RED 131 YARDS
If you have the right club, this short hole with a large putting surface won’t cause too much distress
Hole 8 Par 4
STROKE INDEX 15
BLUE 290 YARDS | RED 256 YARDS
An excellent hole to test your course management.
Hit straight over the corner of this right-to-lefter and shorten your approach to a shot iron.
Play safe and you could run out of fairway.
Hole 9 Par 5
STROKE INDEX 2
BLUE 448 YARDS | RED 414 YARDS
OB all up the right and a lateral water hazard and OB all up the left of this super finishing hole.
The brook also meanders across the fairway, making the placement off the tee crucial.